Welcome to the world of XRP, where blockchain brilliance meets financial finesse! If you’re here, chances are you’re eager to dive into the exhilarating realm of cryptocurrency by setting up your very own XRP wallet. But let’s be honest, does the thought of digital wallets sometimes make you feel like you need a PhD in cryptography just to get started? Fear not, fellow crypto enthusiast, for today we embark on a step-by-step journey that’s as illuminating as it is entertaining. Consider this your ultimate guide to crafting an XRP wallet that’s secure, efficient, and tuned to your trading needs.
Why XRP, you ask? Well, imagine a world where cross-border transactions are faster than your morning coffee brew and cheaper than a cup of that coffee! XRP, the digital asset native to the Ripple consensus ledger, is revolutionizing the financial landscape with its lightning-fast transaction speeds and minimal fees. It’s no wonder XRP has captured the hearts and minds of investors, traders, and fintech professionals alike. But before you can ride the XRP wave, you’ll need a trusty wallet to store those precious coins.
Setting up an XRP wallet might sound as daunting as assembling IKEA furniture with missing instructions, but I assure you, it’s not rocket science. Whether you’re a seasoned crypto trader or a newbie just dipping your toes into the digital waters, this guide will walk you through the process with ease and a sprinkle of humor. So, grab a cup of coffee (or your beverage of choice), and let’s embark on this wallet-creating adventure together!
First things first, let’s talk about the types of XRP wallets available. From hardware wallets that resemble futuristic USB drives to mobile wallets that fit snugly in your pocket, there’s a plethora of options to suit every preference. Which one is right for you? Are you the kind of person who prefers the tactile reassurance of a physical device, or do you revel in the convenience of managing your assets on the go? The choice is yours, and choosing wisely is the first step to crypto mastery.
Now, onto the setup! Ever wondered why setting up an XRP wallet feels like joining an exclusive club? It’s all about security, my friends. You’ll learn how to create a wallet address, safeguard your private keys, and fortify your assets against digital miscreants. Think of it as building a fortress for your digital treasures, complete with a moat, drawbridge, and maybe even a dragon for good measure. By the end of this guide, you’ll be a veritable knight in shining blockchain armor.
Of course, no guide would be complete without addressing the burning questions: What about transaction fees? How do you actually transfer XRP to your wallet? And, most importantly, what should you do if you accidentally send your XRP to the wrong address? (Spoiler alert: panic is not an option.) We’ll tackle these queries head-on, ensuring you navigate the XRP landscape with the confidence of a seasoned trader.
But wait, there’s more! In addition to setting up your XRP wallet, we’ll explore the broader implications of XRP in the world of finance and trading. Ever wondered how XRP is reshaping the way banks handle cross-border payments? Or how it’s paving the way for a decentralized future? We’ll delve into these topics, providing you with insights that are as thought-provoking as they are enlightening.
As your trusted guide on this journey, I, Matt from XRPAuthority.com, am committed to providing you with the latest, most accurate information in the XRP universe. With over a decade of experience in the crypto realm and a passion for all things XRP, I’m here to ensure your transition into the world of digital assets is as smooth as possible. So, buckle up and prepare to embark on a journey that’s as rewarding as it is exciting. Welcome to XRP Authority – your go-to source for all things XRP.
Understanding How to Set Up an XRP Wallet: Step-by-Step Guide Instructions on creating and configuring an XRP wallet. and Its Impact on XRP
Choosing the right wallet
When setting up an XRP wallet, the first and most crucial decision is selecting the right type of wallet. This choice directly impacts the security of your funds, ease of access, and overall user experience. XRP wallets come in different forms, each catering to specific needs, from long-term investors to active traders. Understanding the options available will help you make an informed decision that aligns with your investment strategy.
Types of XRP Wallets
There are several types of XRP wallets, each with its own advantages and trade-offs. Below are the most common options:
- Hardware Wallets – These are physical devices that store your private keys offline, making them highly secure against hacks and online threats. Popular choices include Ledger Nano X and Trezor. If you’re planning to hold a significant amount of XRP for the long term, a hardware wallet is the safest bet.
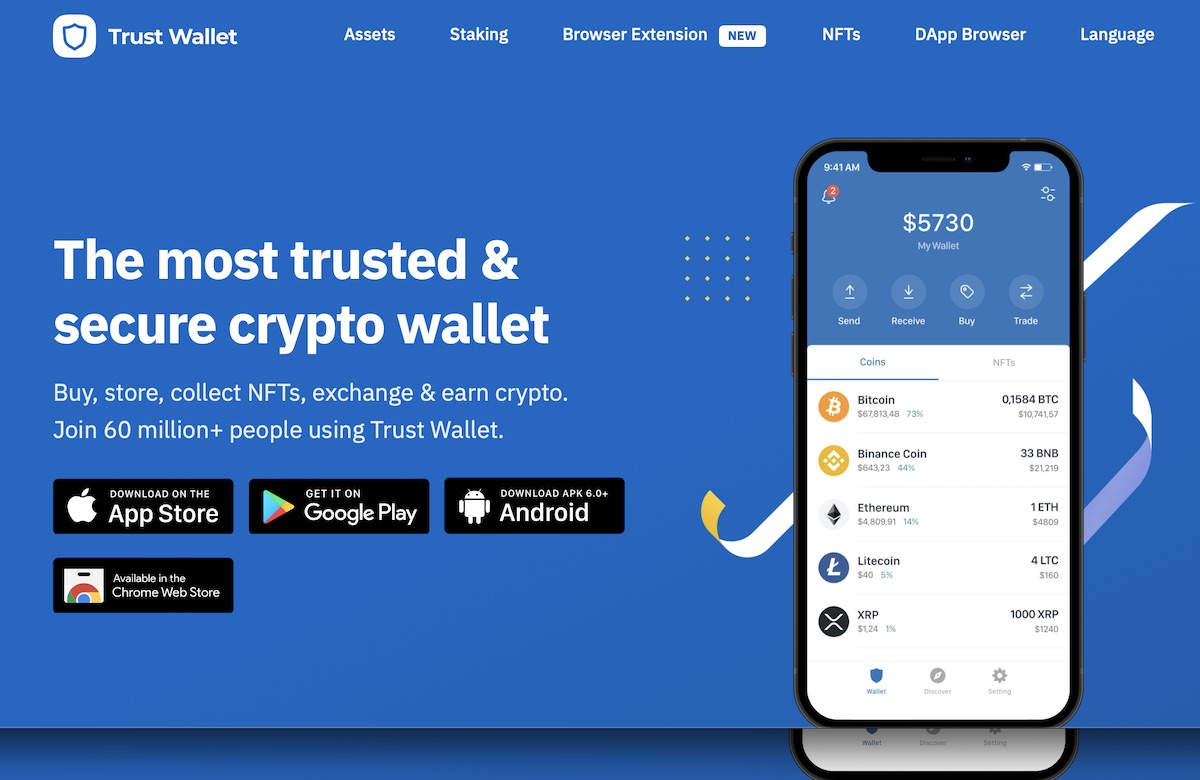
- Software Wallets – These wallets run on your computer or mobile device. They offer convenience but may be vulnerable to malware or phishing attacks. Examples include Trust Wallet and Xumm, both of which provide a user-friendly experience while maintaining a reasonable level of security.
- Web Wallets – These wallets are accessible via a browser and are typically provided by exchanges or third-party services. While they offer ease of use, they are the least secure option since they rely on the security of the service provider. If you choose this route, ensure that the platform has strong security measures in place.
- Paper Wallets – A paper wallet is a physical printout of your private and public keys. While this method keeps your XRP safe from online threats, it also comes with risks such as loss, damage, or theft. Paper wallets are ideal for those who want a completely offline storage solution but require careful handling.
Factors to Consider When Choosing an XRP Wallet
Now that you know the different types of wallets, here are some key factors to consider before making your choice:
- Security – If security is your top priority, a hardware wallet is the best option. Software and web wallets, while convenient, require additional security measures such as two-factor authentication (2FA) and strong passwords.
- Accessibility – If you need quick access to your funds for trading or transactions, a software or web wallet may be more suitable. However, ensure that the wallet provider has a good security track record.
- Backup and Recovery – Always check if the wallet provides a reliable backup and recovery process. Losing access to your private keys can mean losing your XRP forever.
- Compatibility – Ensure that the wallet supports XRP and integrates well with other services you might use, such as decentralized applications (dApps) or exchanges.
- Fees and Costs – Some wallets charge transaction fees or require a minimum balance to activate (XRP wallets, for example, require a minimum reserve of 10 XRP to function). Consider these costs when making your decision.
Best XRP Wallets in 2024
To help you get started, here are some of the best XRP wallets available in 2024:
- Ledger Nano X – Best for long-term storage and security.
- Xumm Wallet – A feature-rich mobile wallet designed specifically for XRP users.
- Trust Wallet – A multi-crypto mobile wallet with built-in DEX support.
- Atomic Wallet – A non-custodial software wallet with staking capabilities.
- Exodus Wallet – A user-friendly software wallet with an intuitive interface.
Choosing the right XRP wallet is a critical step in your crypto journey. Your decision should be based on your security needs, investment goals, and preferred level of accessibility. Once you’ve selected the wallet that best suits your needs, the next step is to set it up properly to ensure your funds remain safe and accessible.
Creating your XRP wallet
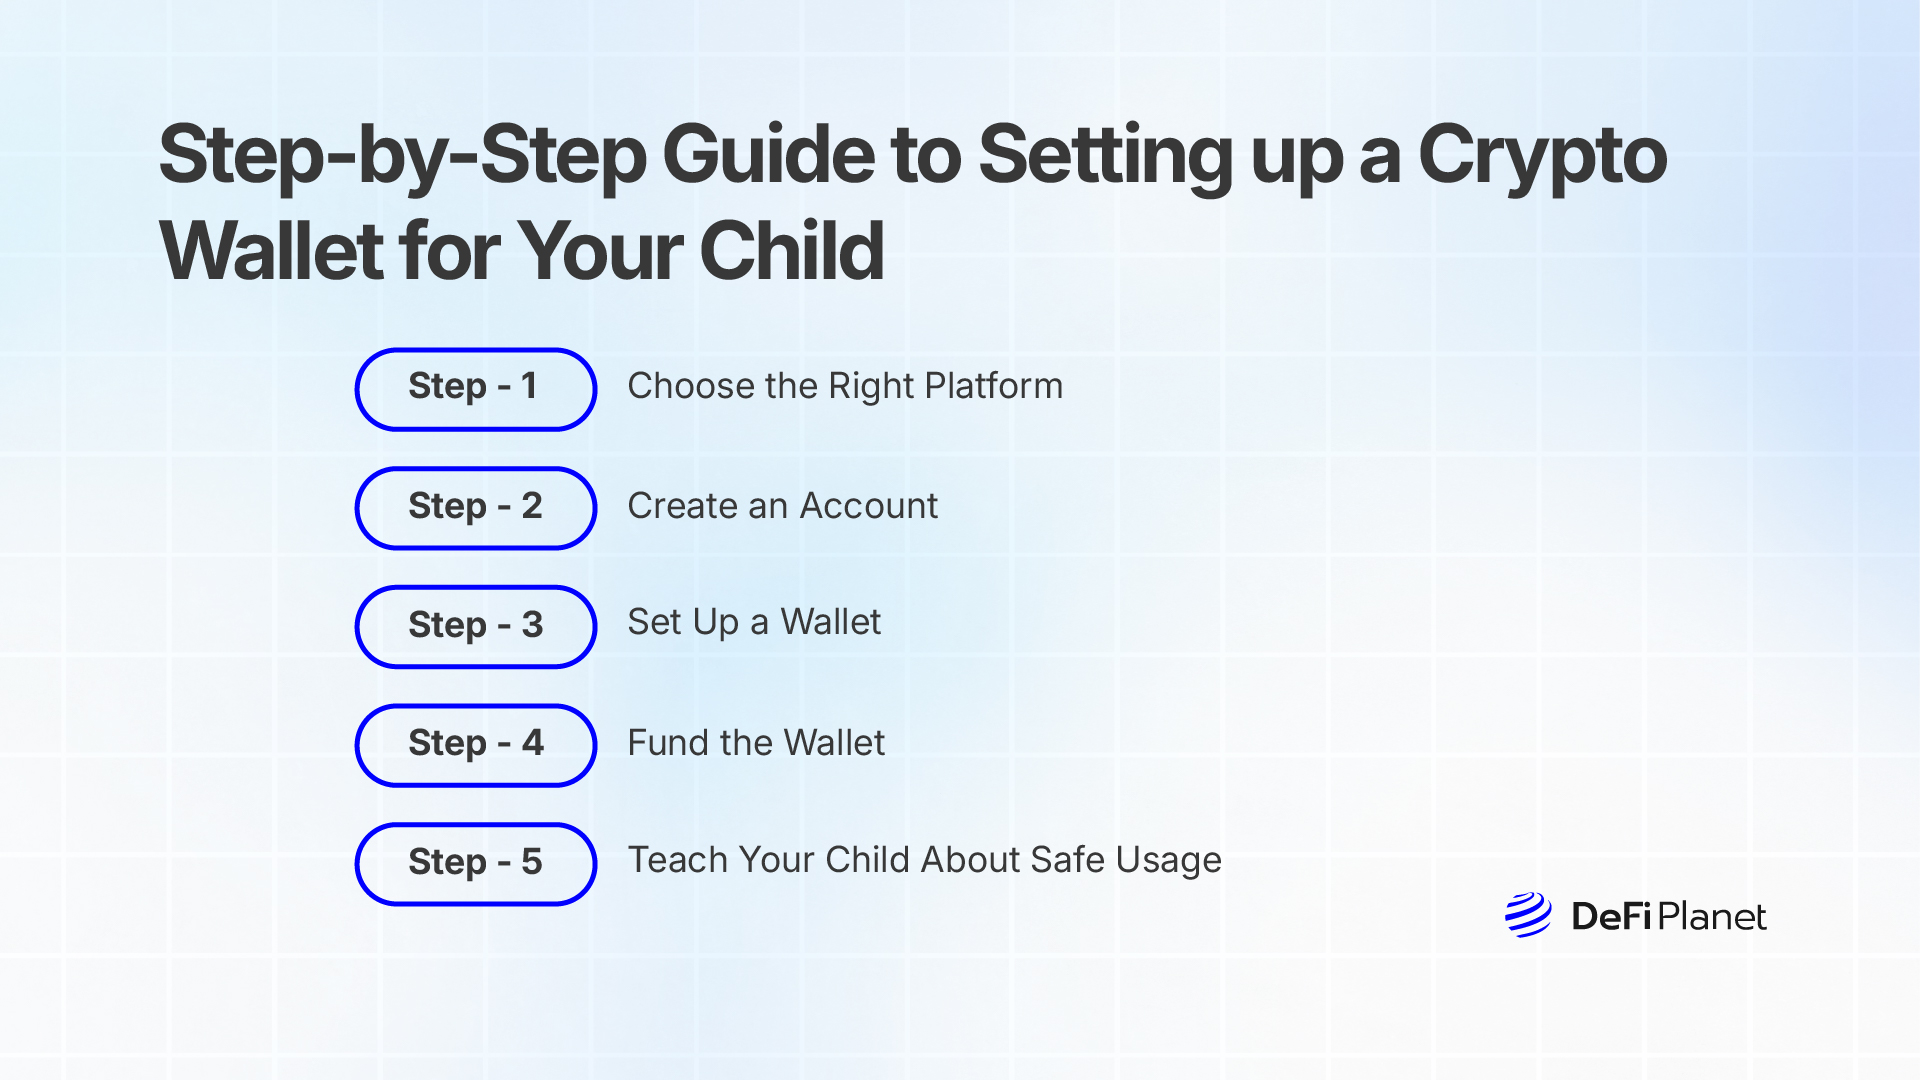
Once you’ve chosen the XRP wallet that best suits your needs, it’s time to set it up. The process varies slightly depending on whether you’re using a hardware, software, or web wallet, but the fundamental steps remain the same. Setting up your wallet correctly is crucial, as it ensures that your funds are both secure and easily accessible when needed. Below, we’ll walk through the step-by-step process of creating your XRP wallet.
Step 1: Download and Install the Wallet
If you’re using a software or mobile wallet, the first step is to download and install the application from a trusted source. Be sure to get the official version from the developer’s website or a reputable app store to avoid counterfeit versions that could compromise your funds.
- For mobile wallets like Xumm or Trust Wallet, visit the Apple App Store or Google Play Store and download the app.
- For desktop wallets like Atomic Wallet or Exodus, download the official software from the provider’s website.
- For hardware wallets like Ledger Nano X, install the corresponding software (Ledger Live) on your computer or smartphone.
After installation, open the application and follow the on-screen instructions to begin setting up your wallet.
Step 2: Create a New Wallet or Restore an Existing One
Once the wallet is installed, you will be given two options: create a new wallet or restore an existing one. If this is your first XRP wallet, select the option to create a new wallet. If you’re recovering a previous wallet, you’ll need to enter your recovery phrase.
- Creating a new wallet: The wallet will generate a unique set of private and public keys. These keys are essential for accessing and managing your funds.
- Restoring an existing wallet: If you already have a wallet, enter your recovery phrase to regain access to your XRP holdings.
At this stage, most wallets will prompt you to generate and store a recovery phrase, which is a series of 12, 18, or 24 words used to restore your wallet if you lose access. Write this phrase down on paper and store it in a secure location—never save it digitally or share it with anyone.
Step 3: Fund Your XRP Wallet
Unlike some cryptocurrencies, XRP wallets require a minimum reserve of 10 XRP to activate. This is a built-in feature of the XRP Ledger to prevent spam and network abuse. To activate your wallet, you’ll need to deposit at least 10 XRP from an exchange or another wallet.
To fund your wallet:
- Copy your wallet’s XRP address from your wallet application. This is a string of alphanumeric characters unique to your wallet.
- Go to a cryptocurrency exchange where you have XRP (such as Binance, Kraken, or Coinbase).
- Initiate a withdrawal and paste your XRP wallet address into the recipient field.
- Double-check the address before confirming the transaction. Sending XRP to the wrong address can result in permanent loss.
- Submit the withdrawal request and wait for the transaction to be processed on the XRP Ledger.
Once the transaction is confirmed, your wallet will be activated, and you can begin using it to send, receive, and store XRP.
Step 4: Set Up Additional Security Features
With your wallet funded and activated, it’s time to add extra layers of security. Many wallets offer enhanced security features that protect your funds from unauthorized access.
- Enable Two-Factor Authentication (2FA): If your wallet supports it, enable 2FA to add an extra verification step when logging in or making transactions.
- Set Up a Strong Password: Choose a unique, complex password that isn’t used elsewhere.
- Use Biometric Authentication: If using a mobile wallet, enable fingerprint or facial recognition for added security.
- Backup Your Wallet: Store your recovery phrase in a safe place, preferably in multiple secure locations.
By taking these precautions, you significantly reduce the risk of losing access to your funds due to hacking, phishing, or device failures.
Step 5: Test a Small Transaction
Before making large transactions, it’s always a good idea to test the wallet by sending a small amount of XRP. This ensures that everything is working correctly and that you understand how to use the wallet.
- Send a small amount of XRP to another wallet or exchange.
- Verify that the transaction appears correctly on the XRP Ledger.
- Check the receiving wallet to confirm the funds have arrived.
Once you’ve successfully completed a test transaction, you can confidently use your wallet for larger transactions.
Setting up your XRP wallet properly is an essential step in securing your digital assets. With your wallet now created, secured, and funded, you’re ready to start managing and using your XRP efficiently.
Securing your wallet
Securing Your Wallet
Now that your XRP wallet is set up and funded, the next crucial step is securing it. Cryptocurrency wallets, especially those holding valuable assets like XRP, are frequent targets for hackers, scammers, and phishing attacks. Taking the right security precautions can mean the difference between safely managing your assets and becoming a victim of theft. Below, we’ll go over the best practices to ensure your XRP wallet remains safe from potential threats.
Protecting Your Private Keys and Recovery Phrase
Your private keys and recovery phrase are the most critical components of your wallet security. Losing them or letting them fall into the wrong hands can result in permanent loss of your XRP. Here’s how to keep them secure:
- Store Your Recovery Phrase Offline: Write down your 12, 18, or 24-word recovery phrase on paper and store it in a safe location. Avoid keeping digital copies, such as screenshots or text files, as these can be hacked.
- Use a Fireproof and Waterproof Storage Solution: Consider storing your recovery phrase in a fireproof and waterproof safe to protect it from physical damage.
- Never Share Your Private Keys: No legitimate service or support team will ever ask for your private key or recovery phrase. If someone requests it, it’s a scam.
- Use Multiple Backups: Keep multiple written copies of your recovery phrase in different secure locations to prevent loss due to theft or accidents.
Enabling Additional Security Features
Most modern XRP wallets provide built-in security features to enhance protection. Take advantage of these options to add extra layers of defense:
- Enable Two-Factor Authentication (2FA): If your wallet or exchange supports 2FA, activate it. This requires an additional verification step when logging in or making transactions, making unauthorized access significantly harder.
- Set Up a Strong Password: Use a complex password that includes upper and lowercase letters, numbers, and special characters. Avoid reusing passwords from other accounts.
- Use Biometric Authentication: If you’re using a mobile wallet like Xumm or Trust Wallet, enable fingerprint or facial recognition to add an extra layer of security.
- Enable Transaction Alerts: Some wallets allow you to set up notifications for transactions. This helps you stay informed about any unauthorized activity.
Keeping Your Wallet Safe from Online Threats
Cybercriminals use various tactics to steal cryptocurrency, including phishing attacks, malware, and fake wallet applications. Here’s how to protect yourself:
- Beware of Phishing Scams: Scammers often impersonate wallet providers, exchanges, or customer support teams to trick users into revealing their private keys. Always verify URLs, and never click on suspicious links in emails or messages.
- Download Wallets Only from Official Sources: Always download wallet applications from the official website, Apple App Store, or Google Play Store. Avoid third-party downloads that may contain malware.
- Keep Your Software Updated: Ensure your wallet software, operating system, and antivirus programs are always up to date to protect against vulnerabilities.
- Use a Secure Internet Connection: Avoid accessing your wallet on public Wi-Fi networks, as they can be compromised. Use a VPN for added security when accessing your wallet online.
Using a Hardware Wallet for Maximum Security
If you plan to store a significant amount of XRP for the long term, consider using a hardware wallet like the Ledger Nano X or Trezor. Hardware wallets keep your private keys offline, making them immune to online attacks.
- Offline Storage: Hardware wallets store your private keys in a secure, offline environment, protecting them from hacks and malware.
- Secure Transactions: When making transactions, the hardware wallet signs them securely before transmitting them, preventing exposure of private keys.
- Backup and Recovery: Hardware wallets generate a recovery phrase that allows you to restore your funds if the device is lost or damaged.
Regularly Monitoring Your Wallet Activity
Even with all security measures in place, it’s essential to regularly monitor your wallet for any suspicious activity:
- Check Transaction History: Periodically review your wallet’s transaction history to ensure all transactions are legitimate.
- Use Blockchain Explorers: Utilize XRP Ledger explorers like XRPScan to verify transactions directly on the blockchain.
- Stay Informed About Security Threats: Follow official XRP and wallet provider announcements to stay updated on potential security risks.
By implementing these security measures, you significantly reduce the risk of losing your XRP to hacks, scams, or human error. With your wallet now properly secured, you’re ready to explore the full potential of XRP by managing and using your funds efficiently.
Managing and using your wallet
Now that your XRP wallet is set up and secured, it’s time to learn how to manage and use it effectively. Whether you’re holding XRP as a long-term investment, making trades, or using it for payments, understanding how to navigate your wallet’s features will ensure a seamless experience. From sending and receiving XRP to tracking transactions and optimizing fees, mastering these functions will empower you to take full control of your digital assets.
Sending XRP Transactions
One of the primary functions of your XRP wallet is sending transactions. Whether you’re transferring funds to an exchange, another wallet, or paying for services, follow these steps to ensure a smooth transaction:
- Step 1: Open Your Wallet – Launch your XRP wallet application and navigate to the “Send” or “Transfer” section.
- Step 2: Enter the Recipient’s Address – Copy and paste the recipient’s XRP wallet address. Be extra cautious when entering the address, as incorrect entries can result in irreversible loss of funds.
- Step 3: Specify the Amount – Input the amount of XRP you want to send. Your wallet should display the equivalent value in fiat currency for reference.
- Step 4: Add a Destination Tag (If Required) – Some exchanges and wallets require a destination tag to identify your transaction. Check with the recipient to confirm if a tag is necessary.
- Step 5: Confirm and Send – Review all transaction details, including the recipient’s address and amount. Once verified, confirm the transaction and enter any required security credentials (e.g., PIN, 2FA).
- Step 6: Track the Transaction – Use an XRP Ledger explorer like XRPScan to monitor the status of your transaction.
Most XRP transactions are processed within seconds due to the network’s high-speed capabilities. However, always verify with the recipient to ensure the funds have arrived successfully.
Receiving XRP
Receiving XRP is straightforward, whether you’re receiving payments, withdrawing from an exchange, or transferring funds from another wallet. Here’s how:
- Step 1: Locate Your Wallet Address – In your wallet app, navigate to the “Receive” or “Deposit” section to find your unique XRP address.
- Step 2: Share the Address – Copy and share your XRP address with the sender. If required, also provide your destination tag.
- Step 3: Confirm the Transaction – Once the sender completes the transfer, check your wallet balance to confirm receipt.
- Step 4: Verify on the Blockchain – Use an XRP Ledger explorer to track incoming transactions.
Always double-check that the sender has entered the correct wallet address and destination tag (if applicable) to avoid misdirected funds.
Tracking Transactions and Wallet Activity
Keeping track of your XRP transactions is essential for security and financial management. Most wallets provide a transaction history where you can review:
- Transaction timestamps – View the date and time of each transaction.
- Transaction amounts – Check the amount sent or received.
- Transaction status – Confirm whether a transaction was successful, pending, or failed.
- Destination tags – Ensure that transactions to exchanges were processed correctly.
For a more in-depth review, use blockchain explorers like XRPScan or Bithomp to verify transactions directly on the XRP Ledger.
Optimizing Transaction Fees
Unlike Bitcoin and Ethereum, which have fluctuating network fees, XRP transactions have a minimal and predictable cost. However, you can still optimize your fees by:
- Avoiding unnecessary transactions – Since XRP wallets require a minimum reserve of 10 XRP, avoid creating multiple wallets unless necessary.
- Using trusted exchanges and services – Some platforms charge additional withdrawal fees, so compare costs before transferring funds.
- Sending larger transactions in fewer steps – Instead of multiple small transfers, consolidate transactions to reduce overall fees.
Storing and HODLing XRP
If you’re holding XRP as a long-term investment, consider best practices for secure storage:
- Use a hardware wallet – A Ledger Nano X or Trezor provides maximum security for long-term holdings.
- Enable all security features – Two-factor authentication, strong passwords, and biometric security add extra layers of protection.
- Keep your recovery phrase secure – Store it offline in a safe place to ensure you can restore your wallet if needed.
Exploring XRP’s Real-World Use Cases
Beyond investment, XRP has numerous real-world applications:
- Cross-border payments – XRP is used by financial institutions for fast and cost-effective international transfers.
- Micropayments – The low transaction fees make XRP ideal for small payments, tipping, and digital purchases.
- Decentralized finance (DeFi) – XRP is increasingly integrated into DeFi platforms for lending, borrowing, and staking.
- Remittances – XRP’s speed and low cost make it a popular choice for sending money globally.
By understanding how to manage and use your XRP wallet effectively, you can maximize the benefits of holding and transacting with XRP while keeping your assets secure.