
Are you ready to dive into the thrilling world of cryptocurrency and add a little XRP sparkle to your portfolio? If you’ve ever found yourself pondering, “How do I actually buy XRP on Binance?” you’re in luck! Welcome to our step-by-step guide, where we unravel the mysteries of purchasing XRP on Binance with a blend of technical insights, humor, and a dash of wit. As the owner of XRPAuthority.com and a crypto investor since the days when Bitcoin was just a toddler, I’m here to navigate you through this exciting journey. So, why XRP, you ask? Let’s find out!
XRP isn’t just another coin floating in the vast sea of cryptocurrencies—it’s a pioneer in facilitating fast and cost-effective international payments. If you’ve ever fantasized about transferring money across borders faster than you can say “blockchain,” XRP is your superhero without a cape. But how do you get your hands on some of this digital gold on Binance, you ask? It’s simpler than deciphering a blockchain transaction hash, and we’ll break it down for you with ease.
Before we embark on this adventure, let’s take a moment to appreciate the role of Binance as one of the leading crypto exchanges worldwide. Think of Binance as the bustling marketplace where crypto enthusiasts congregate, and XRP is the gem you’re seeking amidst this vibrant bazaar. You might wonder if buying XRP on Binance is akin to navigating a labyrinth without a map, but fear not—we’ve got a detailed, step-by-step guide to keep you on track.
So, how does one start this journey? First, you’ll need a Binance account, which is easier to set up than finding an ATM that dispenses XRP directly (spoiler: they don’t exist yet). Once you’re in, it’s time to explore the vast array of trading pairs, where XRP trades like a rockstar among the crypto crowd. Ready to make your first trade? We’ll show you how to convert your fiat or crypto into XRP faster than a meme can go viral.
Did you know that XRP’s consensus protocol is what gives it the superpower of speedy transactions? Unlike Bitcoin’s proof-of-work, XRP’s unique mechanism is designed for efficiency, making it a darling in the fintech world. Whether you’re a seasoned trader or a curious newcomer, understanding XRP’s place in the blockchain ecosystem will make you appreciate its role even more. And yes, we promise to keep the jargon to a minimum—no need for a Ph.D. in cryptography here!
As we guide you through the buying process, we’ll also sprinkle in some tips and tricks to keep your investment secure. After all, in the crypto world, safety is paramount, and Binance offers robust features to protect your assets. From two-factor authentication to withdrawal whitelists, we’ll ensure you’re not only buying XRP but doing so with peace of mind. Because let’s face it, no one wants their crypto adventure to turn into a horror story.
Now, if you’re thinking, “But Matt, why should I trust XRP Authority for this guide?” The answer is simple—we’ve been around the crypto block a few times and know the ins and outs of XRP like the back of our digital hand. Our passion for XRP is matched only by our commitment to providing you with the most comprehensive, engaging, and reliable insights. So, whether you’re an XRP aficionado or just XRP-curious, you’ve come to the right place.
In conclusion, as you embark on your XRP buying journey on Binance, remember that XRP Authority is your trusted companion, here to provide insights, tips, and a sprinkle of wit along the way. We’re committed to empowering you with knowledge that not only informs but also entertains. So, buckle up, crypto enthusiasts, because with XRP Authority by your side, your journey into the world of XRP and beyond is bound to be as rewarding as it is exciting. Happy trading!
Understanding How to Buy XRP on Binance: A Complete Tutorial Step-by-step guide to purchasing XRP on Binance. and Its Impact on XRP
Creating a Binance account
Before you can buy XRP on Binance, you need to have a verified Binance account. Binance is one of the largest cryptocurrency exchanges in the world, offering a secure platform for trading digital assets. Setting up an account is a straightforward process, but it requires a few essential steps to ensure security and compliance with global regulations.
Step 1: Visit the Binance Website
Start by navigating to the official Binance website (www.binance.com). Always double-check the URL to ensure you’re on the legitimate Binance platform, as phishing sites can look very similar. If you prefer mobile trading, you can also download the Binance app from the App Store or Google Play.
Step 2: Register for an Account
- Click on the “Register” button located at the top right corner of the homepage.
- Choose whether you want to sign up using an email address or phone number.
- Create a strong password that includes a mix of uppercase letters, lowercase letters, numbers, and special characters.
- Enter the referral code (if you have one) to take advantage of any promotions.
- Click “Create Account” and check your email or phone for a verification code.
Once you enter the verification code, your Binance account is officially created. However, to fully access all Binance features, you’ll need to complete identity verification.
Step 3: Verify Your Identity (KYC Process)
To comply with regulatory requirements, Binance requires all users to complete a Know Your Customer (KYC) process. This step enhances security and helps prevent fraudulent activities.
- Log into your Binance account and navigate to the “Identification” section.
- Click “Verify” and select your country of residence.
- Upload a government-issued ID (passport, driver’s license, or national ID card).
- Complete the facial verification process using your webcam or mobile camera.
- Wait for Binance to review and approve your documents (this usually takes a few minutes to a few hours).
Once your identity is verified, you’ll have full access to Binance’s trading features, including the ability to deposit funds and buy XRP.
Step 4: Enable Two-Factor Authentication (2FA)
To enhance security, Binance strongly recommends enabling Two-Factor Authentication (2FA). This extra layer of protection ensures that even if someone gets hold of your password, they still need a second form of verification to access your account.
- Go to the “Security” section in your Binance account settings.
- Select either Google Authenticator or SMS Authentication.
- Follow the instructions to set up and activate 2FA.
Once 2FA is enabled, you’ll need to enter a verification code every time you log in, withdraw funds, or make significant account changes.
Step 5: Secure Your Account
As an additional security measure, consider enabling anti-phishing codes, withdrawal whitelist addresses, and device management settings. These features help protect your funds from unauthorized access.
With your Binance account fully set up and secured, you’re now ready to deposit funds and start buying XRP. The next step involves adding funds to your Binance wallet, which can be done via bank transfer, credit card, or cryptocurrency deposits.
Depositing funds into your account
Now that your Binance account is set up and secured, the next step is to deposit funds so you can purchase XRP. Binance offers multiple funding options, including bank transfers, credit/debit card payments, and cryptocurrency deposits. Choosing the right method depends on factors like transaction speed, fees, and availability in your region.
Step 1: Navigate to the Deposit Section
To begin, log into your Binance account and follow these steps:
- Click on “Wallet” at the top right corner of the Binance homepage.
- Select “Fiat and Spot” from the dropdown menu.
- Click the “Deposit” button.
Here, you’ll see options for depositing fiat currency (such as USD, EUR, or GBP) or cryptocurrency. The process varies depending on your chosen method, so let’s break it down.
Step 2: Depositing Fiat Currency
If you prefer to deposit fiat currency, Binance provides several payment methods, including bank transfers, credit/debit cards, and third-party services like Simplex or Banxa. Here’s how to proceed:
Bank Transfer
- After selecting “Fiat”, choose your preferred currency (e.g., USD, EUR, GBP).
- Select “Bank Transfer” as your deposit method.
- Follow the on-screen instructions to initiate a transfer from your bank account to Binance.
- Depending on your bank and region, processing times can range from a few minutes to a couple of business days.
Tip: Some banks may charge a small fee for wire transfers. Check with your bank beforehand to avoid surprises.
Credit/Debit Card
- Select “Credit/Debit Card” as your deposit method.
- Enter the amount you wish to deposit and select your currency.
- Provide your card details and confirm the transaction.
- Funds should appear in your Binance account almost instantly.
Note: Credit/debit card deposits might have higher fees compared to bank transfers, so review the costs before proceeding.
Step 3: Depositing Cryptocurrency
If you already own cryptocurrency and want to fund your Binance account with digital assets, follow these steps:
- On the deposit page, select “Crypto” instead of fiat.
- Choose the cryptocurrency you want to deposit (e.g., Bitcoin, Ethereum, USDT).
- Copy the Binance deposit address or scan the QR code.
- Go to your external wallet or exchange and send funds to the copied address.
Blockchain transactions typically take a few minutes to confirm, depending on network congestion.
Step 4: Confirm Your Deposit
After initiating a deposit, you can track its status under the “Transaction History” section in your Binance wallet. Once the funds are credited, you’ll be ready to buy XRP. If your deposit is delayed, check the transaction hash on a blockchain explorer or contact Binance support for assistance.
With your funds successfully deposited, you’re now set to purchase XRP on Binance. The next step involves navigating the Binance trading interface and executing your first XRP buy order.
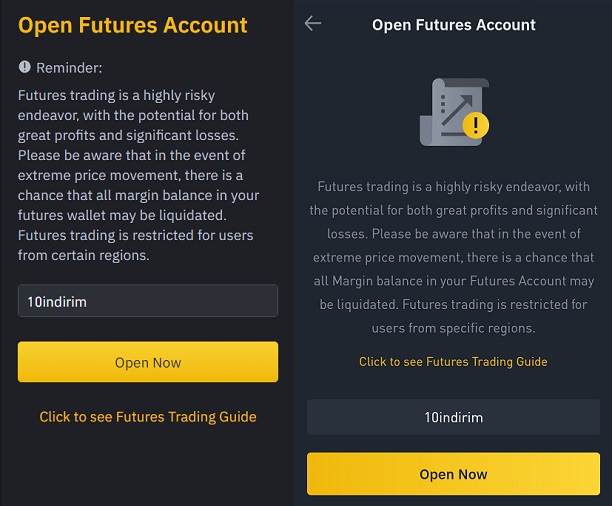
Buying XRP on Binance
Now that your Binance account is funded, it’s time to buy XRP. Binance offers several ways to purchase XRP, including spot trading, instant buy with a credit/debit card, and peer-to-peer (P2P) trading. Each method has its own advantages, depending on your trading experience and preferences. Below, we’ll walk you through the step-by-step process of buying XRP on Binance.
Step 1: Navigate to the Trading Section
To begin, log into your Binance account and head over to the trading section:
- Click on “Trade” in the top menu.
- Choose either “Convert” for a simple swap or “Spot” for advanced trading.
If you’re a beginner, the Convert option allows you to swap your deposited funds for XRP instantly, without dealing with order books or market fluctuations. However, if you want more control over your purchase price, the Spot trading option is the way to go.
Step 2: Choose the XRP Trading Pair
On the Binance trading interface, you’ll need to select the XRP trading pair that matches your deposited currency. Binance offers several XRP pairs, including:
- XRP/USDT – If you deposited USDT (Tether), this is the most liquid trading pair.
- XRP/BTC – If you’re trading Bitcoin for XRP.
- XRP/EUR – If you funded your account with Euros.
- XRP/BNB – If you want to trade Binance Coin (BNB) for XRP.
Use the search bar in the trading interface to find the correct pair and click on it to proceed.
Step 3: Choose Your Order Type
Binance provides different order types to buy XRP, each suited for different trading strategies:
Market Order (Instant Purchase)
- Select “Market” as your order type.
- Enter the amount of XRP you want to buy.
- Click “Buy XRP”, and your order will be executed instantly at the best available price.
This is the fastest way to buy XRP, but keep in mind that market orders may experience slight price fluctuations due to slippage.
Limit Order (Set Your Own Price)
- Select “Limit” as your order type.
- Enter the price at which you want to buy XRP.
- Specify the amount of XRP you want to purchase.
- Click “Buy XRP”, and your order will be placed in the order book.
Your order will only be executed if the market price reaches your specified price. This method is ideal for traders looking to buy XRP at a certain price point.
Stop-Limit Order (Automated Trading)
- Select “Stop-Limit” as your order type.
- Enter the Stop Price (the price at which the limit order is triggered).
- Set the Limit Price (the price at which you want to buy XRP).
- Specify the amount of XRP to purchase and confirm your order.
This advanced order type is useful for traders who want to automate their buys based on market movements.
Step 4: Review and Confirm Your Order
Before finalizing your purchase, double-check the order details to ensure accuracy. Once you confirm the order, Binance will execute it based on the order type you selected.
Step 5: Check Your XRP Balance
After your order is executed, you can verify your XRP holdings by navigating to:
- Click on “Wallet” in the top menu.
- Select “Fiat and Spot” to view your available XRP balance.
If you used a market order, your XRP should appear immediately. If you placed a limit order, your XRP will only be credited once the order is filled.
Alternative Method: Buy XRP with a Credit/Debit Card
If you prefer a quick and easy way to buy XRP without navigating the trading interface, Binance allows you to purchase XRP directly with a credit or debit card. Here’s how:
- Go to the “Buy Crypto” section on Binance.
- Select “Credit/Debit Card” as your payment method.
- Choose XRP as the cryptocurrency you want to buy.
- Enter the amount you wish to purchase and confirm the transaction.
Your XRP will be credited to your Binance wallet almost instantly. However, note that credit/debit card purchases may have higher fees compared to trading on the spot market.
Step 6: Secure Your XRP
Now that you’ve successfully purchased XRP, the next step is securing and managing your investment. While Binance provides a secure platform, keeping your XRP in an external wallet offers added protection against exchange risks.
In the next section, we’ll explore the best storage options for your XRP and how to manage your holdings effectively.
Storing and managing your XRP
Storing and Managing Your XRP
Now that you’ve successfully purchased XRP on Binance, the next crucial step is ensuring its security and proper management. While Binance provides a secure platform for storing your funds, keeping your XRP in an external wallet offers additional protection against potential exchange risks. In this section, we’ll explore different XRP storage options, security measures, and best practices for managing your digital assets effectively.
Choosing the Right Wallet for Your XRP
When it comes to storing XRP, you have several options. The ideal choice depends on your investment strategy, security preferences, and how frequently you plan to trade. Here are the main types of wallets you can use:
1. Exchange Wallet (Binance Wallet)
- Convenient for active traders who frequently buy and sell XRP.
- Binance offers security features like two-factor authentication (2FA) and withdrawal whitelist protection.
- However, keeping large amounts of XRP on an exchange carries some risks, such as hacking threats or exchange downtime.
Best for: Short-term traders who need quick access to their XRP.
2. Software Wallets (Hot Wallets)
- Wallets like Trust Wallet, Exodus, and Atomic Wallet allow you to store XRP on your computer or mobile device.
- These wallets provide more control over your private keys compared to exchange wallets.
- Since they are connected to the internet, they are still vulnerable to cyber threats.
Best for: Investors who want a balance between convenience and security.
3. Hardware Wallets (Cold Wallets)
- Devices like Ledger Nano X and Trezor store your XRP offline, making them highly secure.
- They protect your funds from online threats, phishing attacks, and exchange failures.
- While hardware wallets require an initial investment, they are the safest option for long-term storage.
Best for: Long-term investors and those holding large amounts of XRP.
4. Paper Wallets
- A paper wallet is a physical printout of your XRP private and public keys.
- Since it is completely offline, it eliminates hacking risks.
- However, paper wallets are vulnerable to physical damage or loss.
Best for: Investors who want an ultra-secure, offline storage method.
How to Withdraw XRP from Binance to an External Wallet
If you decide to move your XRP to a private wallet, follow these steps to ensure a safe withdrawal:
Step 1: Get Your XRP Wallet Address
- Open your external wallet (e.g., Trust Wallet, Ledger, or Exodus).
- Navigate to the Receive section and select XRP.
- Copy your unique XRP wallet address.
- Some wallets require a Destination Tag—a unique identifier for transactions. Check if your wallet needs one.
Step 2: Initiate the Withdrawal on Binance
- Log into your Binance account and go to Wallet > Fiat and Spot.
- Find XRP in your asset list and click Withdraw.
- Paste your wallet address and enter the correct Destination Tag if required.
- Specify the amount of XRP you want to transfer.
Step 3: Confirm and Complete the Withdrawal
- Double-check the wallet address and Destination Tag to avoid losing funds.
- Click Withdraw and confirm the transaction via email or 2FA.
- The transfer usually takes a few minutes but may take longer depending on network congestion.
Tip: Always send a small test transaction before transferring large amounts to ensure the address is correct.
Best Practices for Managing Your XRP
Now that your XRP is securely stored, here are some tips to manage your holdings effectively:
1. Keep Your Private Keys Safe
- Never share your private keys or seed phrases with anyone.
- Store them in a secure location, such as a locked safe or encrypted digital storage.
2. Regularly Update Your Wallet Software
- Ensure your wallet software is up to date to protect against vulnerabilities.
- Only download updates from official sources.
3. Enable Security Features
- Set up two-factor authentication (2FA) on your Binance account and wallet.
- Use strong, unique passwords for all crypto-related accounts.
4. Diversify Your Storage
- Consider splitting your XRP holdings between multiple wallets for added security.
- Use a mix of hot and cold storage solutions depending on your needs.
5. Stay Informed About Market Trends
- Keep up with XRP news, market trends, and regulatory developments.
- Follow reputable sources like Binance Academy, Ripple’s official blog, and crypto news platforms.
By following these strategies, you can ensure that your XRP investment remains secure while maintaining easy access when needed. Whether you’re a short-term trader or a long-term holder, proper storage and management are key to protecting your digital assets.