Welcome, future NFT pioneers and XRP enthusiasts! Imagine combining the digital art revolution with the trailblazing speed and efficiency of XRP. Intrigued? Well, you’re in luck because minting an NFT on the XRP Ledger (XRPL) is not just a possibility—it’s a reality. This isn’t just another guide; it’s your golden ticket to the world where art meets finance, and XRP leads the charge. But first, let’s address the burning question: why should you choose the XRP Ledger for your NFT journey? Spoiler alert—it’s faster, cheaper, and more eco-friendly than most of its counterparts. Yes, you heard me right, and no, I’m not pulling your leg!
Let’s start with a quick trip down memory lane. Since its inception in 2012, XRP has been revolutionizing the financial sector, offering unmatched transaction speed and efficiency. It’s like the Usain Bolt of blockchain—fast, reliable, and always ahead of the competition. Now, with the introduction of NFTs on the XRPL, you can harness these very qualities to create and trade your digital assets. If you’ve been under the impression that NFT minting is only for Ethereum enthusiasts, think again. XRPL is here to challenge the status quo with its superior features and robust ecosystem.
Creating an NFT on the XRPL is akin to constructing a skyscraper on a solid foundation. You get the stability and security that XRP offers, coupled with low transaction costs. Who doesn’t love saving a few bucks? Your wallet will thank you later. Plus, with XRP’s commitment to sustainability, you can mint NFTs without the guilt of a massive carbon footprint. That’s right—go green and still make a statement in the digital art world!
But let’s not get ahead of ourselves. You’re probably wondering, “How exactly do I mint an NFT on XRPL?” Fear not, intrepid reader. This guide will walk you through every step, from setting up your XRP wallet to issuing your very first NFT. We’ll delve into the nitty-gritty details, ensuring that even the most technically challenged among us can follow along. It’s like cooking with a recipe—except this dish could potentially earn you crypto riches!
Why choose XRPL over other blockchains for your NFT endeavors? Well, imagine a world where you can complete transactions in seconds, not minutes, and at a fraction of the cost. That’s the power of XRP. It’s like trading in your clunky old typewriter for a sleek, new laptop. The future of blockchain is here, and it’s not waiting for anyone. With XRP, you’re not just investing in a cryptocurrency; you’re betting on a revolution.
As you embark on this NFT adventure, remember that XRPL isn’t just about efficiency and cost-effectiveness. It’s also about community. The XRP ecosystem is filled with passionate developers and enthusiasts who are constantly innovating and pushing the boundaries of what’s possible. By choosing XRPL, you’re joining a thriving community that values progress and collaboration. So, why not be a part of something bigger?
In a world where blockchain technology is rapidly evolving, staying informed and making informed decisions is crucial. That’s where XRP Authority comes in. As your trusted guide in the world of XRP and NFTs, we’re committed to providing you with the latest insights, tips, and news. Whether you’re a seasoned investor or a curious newcomer, we’ve got the resources to keep you ahead of the curve. So, buckle up, and prepare to unlock the full potential of the XRP Ledger with us by your side. After all, at XRP Authority, we’re not just experts—we’re your partners in this thrilling crypto journey!
Understanding How to Mint an NFT on the XRP Ledger A complete guide to creating and issuing NFTs using XRPL. and Its Impact on XRP
Understanding NFTs on the XRP Ledger
Non-Fungible Tokens (NFTs) have taken the digital asset space by storm, revolutionizing ownership and monetization of digital art, music, collectibles, and even real-world assets. While Ethereum has long been the dominant blockchain for NFTs, the XRP Ledger (XRPL) is emerging as a powerful, efficient alternative, offering lower transaction costs and faster settlement times. But what makes XRPL different from other NFT ecosystems, and why should creators and investors pay attention? Let’s break it down.
What Are NFTs and How Do They Work on XRPL?
NFTs are unique digital assets stored on a blockchain, each with distinct metadata that proves its authenticity and ownership. Unlike cryptocurrencies such as XRP or Bitcoin, which are fungible and can be exchanged on a one-to-one basis, NFTs are indivisible and irreplaceable.
The XRP Ledger introduced native NFT functionality with the XLS-20 standard, designed to optimize NFT minting, transferring, and trading while maintaining XRPL’s hallmark efficiency. This means that NFTs on XRPL benefit from:
- Low Transaction Costs: Unlike Ethereum’s often exorbitant gas fees, XRPL’s transaction costs are minimal, making NFT creation and trading more accessible.
- High-Speed Transactions: XRPL is built for near-instant settlements, meaning NFT transfers happen within seconds rather than minutes or hours.
- Eco-Friendly Mechanism: Unlike proof-of-work (PoW) networks such as Ethereum (prior to its Ethereum 2.0 upgrade), XRPL operates on a consensus mechanism, significantly reducing energy consumption.
- Built-in Decentralized Exchange (DEX): XRPL’s native DEX allows seamless trading of NFTs without requiring third-party platforms.
Why Choose XRPL for Minting NFTs?
For creators and investors alike, choosing the right blockchain for NFT minting and trading is crucial. XRPL’s NFT capabilities bring several advantages over traditional NFT ecosystems:
- Scalability: XRPL can handle up to 1,500 transactions per second, ensuring smooth operations even during high network activity.
- Lower Entry Barriers: With Ethereum’s gas fees pricing out many newcomers, XRPL presents a more cost-effective solution for artists and collectors.
- Security and Stability: XRPL has been running continuously since 2012, demonstrating resilience and reliability.
- Interoperability: With growing cross-chain functionalities, XRPL NFTs can potentially integrate with other blockchain ecosystems in the future.
Types of NFTs on the XRP Ledger
XRPL supports a wide range of NFTs, catering to various industries and use cases:
- Digital Art & Collectibles: Artists can tokenize their work, ensuring authenticity and enabling direct sales without intermediaries.
- Music & Media: Musicians and content creators can issue NFTs representing exclusive tracks, albums, or digital experiences.
- Virtual Real Estate: XRPL NFTs can be used to represent ownership of virtual land in metaverse ecosystems.
- Gaming Assets: In-game items, skins, and characters can be tokenized, enabling true ownership and secondary market trading.
- Real-World Asset Tokenization: NFTs can represent physical assets such as real estate, luxury goods, or event tickets, bridging the gap between digital and physical ownership.
The Future of XRPL NFTs
As the NFT space continues to evolve, XRPL is positioning itself as a formidable player. With ongoing developments in NFT marketplaces, improved interoperability, and institutional adoption, XRPL’s role in the NFT economy is only set to grow. Whether you’re an artist looking to mint your first NFT or an investor seeking the next big opportunity, understanding XRPL’s NFT ecosystem is essential for staying ahead in the digital asset revolution.
Setting up your XRPL wallet
Setting Up Your XRPL Wallet
Before you can mint an NFT on the XRP Ledger, you’ll need a compatible wallet that supports XRPL’s NFT functionalities. Your wallet acts as your digital vault, allowing you to store, manage, and transact XRP and NFTs securely. Choosing the right wallet is crucial, as it determines your ease of use, security, and access to XRPL’s features.
Choosing the Right XRPL-Compatible Wallet
Not all crypto wallets are built the same, and when dealing with NFTs on XRPL, you need one that supports the XLS-20 standard. Here are some of the most popular XRPL-compatible wallets:
- Xumm Wallet: A non-custodial wallet designed specifically for XRPL, offering seamless interaction with the ledger and decentralized applications.
- Ledger Nano (with XRP Toolkit): A hardware wallet that provides enhanced security for long-term storage of XRP and NFTs.
- Trust Wallet: A multi-chain mobile wallet that supports XRPL assets, though NFT functionalities may be limited.
- XRPL Labs’ Xaman (Upcoming): A next-gen XRPL wallet designed to improve NFT and DeFi interactions.
For most users, Xumm Wallet is the best choice due to its deep integration with the XRP Ledger and support for NFT transactions. It allows you to sign transactions securely and interact with XRPL’s decentralized ecosystem.
Setting Up Your Xumm Wallet
To get started with minting NFTs, follow these steps to set up your Xumm Wallet:
- Download Xumm: Visit the official website (Xumm.app) and download the app for iOS or Android.
- Create a New Wallet: Open the app and select “Create a New Account.” You’ll be given a unique secret key (also known as a seed phrase). Store this securely, as losing it means losing access to your funds.
- Activate Your Wallet: Unlike some blockchains, XRPL requires a small deposit (typically 10 XRP) to activate a new wallet. You can send XRP from an exchange or another wallet.
- Secure Your Wallet: Enable biometric authentication or set a strong PIN to prevent unauthorized access.
- Connect to XRPL Services: Xumm integrates with various XRPL applications, including NFT marketplaces and decentralized exchanges.
Funding Your Wallet
Before minting an NFT, you’ll need some XRP in your wallet to cover transaction fees and reserve requirements. The process is simple:
- Buy XRP: Purchase XRP from a cryptocurrency exchange like Binance, Kraken, or Coinbase.
- Transfer to Your Wallet: Withdraw XRP to your Xumm wallet address. Always double-check the destination address to avoid mistakes.
- Ensure Sufficient Balance: You’ll need at least 10 XRP to activate the wallet and additional XRP for minting fees (usually minimal compared to Ethereum gas fees).
Connecting Your Wallet to an XRPL NFT Marketplace
Once your wallet is set up and funded, you’re ready to connect to an XRPL NFT marketplace. Some of the leading platforms include:
- OnXRP: A growing NFT marketplace built on XRPL, offering a variety of digital collectibles.
- XRP Cafe: A user-friendly platform designed for minting, selling, and buying NFTs.
- Sologenic NFT Marketplace: A decentralized exchange and NFT marketplace leveraging XRPL’s speed and efficiency.
To connect your wallet:
- Visit the NFT marketplace of your choice.
- Select “Connect Wallet.”
- Scan the QR code using Xumm or enter your wallet details manually.
- Authorize the connection and start exploring NFTs on XRPL.
Next Steps
With your wallet fully set up and connected, you’re now ready to mint your first NFT on the XRP Ledger. The next step involves creating and issuing your NFT, ensuring it meets the standards required for trading and ownership verification. Stay tuned as we walk through the minting process in detail.
Minting your NFT step by step
Minting Your NFT Step by Step
Now that your XRPL wallet is set up and funded, it’s time to dive into the exciting process of minting your very own NFT on the XRP Ledger. Unlike Ethereum-based NFT minting, which often involves high gas fees and complex smart contract interactions, XRPL simplifies the process with its efficient and cost-effective XLS-20 standard. Whether you’re an artist, musician, or entrepreneur looking to tokenize assets, this step-by-step guide will walk you through the process of creating and issuing an NFT on XRPL.
Step 1: Define Your NFT Concept and Metadata
Before you start minting, you need to define what your NFT represents. Metadata plays a crucial role in determining the uniqueness and value of your NFT. Here’s what you need to prepare:
- Title: The name of your NFT (e.g., “Cosmic Panther #001”).
- Description: A brief summary of what your NFT represents. This could include inspiration, purpose, or rarity details.
- Media File: The actual digital asset (image, video, music, or document) that will be linked to your NFT.
- Attributes & Properties: If you’re creating a collection, attributes help categorize your NFTs (e.g., “Background: Neon Blue,” “Rarity: Legendary”).
- Royalties: Decide the percentage of royalties you want to earn from secondary sales.
Once you have these details prepared, you’re ready to proceed with the actual minting process.
Step 2: Choose an XRPL NFT Minting Platform
To mint an NFT on the XRP Ledger, you’ll need to use an NFT minting platform that supports XRPL’s XLS-20 standard. Some of the most popular options include:
- OnXRP: A comprehensive NFT marketplace with minting tools and a built-in ecosystem for trading XRPL-based NFTs.
- XRP Cafe: A user-friendly NFT platform designed specifically for creators looking to launch NFT collections.
- Sologenic NFT Marketplace: A decentralized marketplace that allows seamless NFT minting and trading.
Each platform offers a slightly different user experience, but the minting process generally follows the same fundamental steps.
Step 3: Connect Your XRPL Wallet
Once you’ve chosen your minting platform, the next step is to connect your XRPL wallet. Follow these simple steps:
- Navigate to the NFT minting section of your chosen platform.
- Click on “Connect Wallet” and select the XRPL-compatible wallet you set up earlier (e.g., Xumm).
- Scan the QR code using your Xumm app or manually approve the connection.
- Once connected, ensure your wallet has sufficient XRP balance to cover minting fees.
Step 4: Upload Your NFT and Input Metadata
Now comes the fun part—uploading your NFT! Follow these steps:
- Click on “Create NFT” or “Mint NFT” within the platform.
- Upload your media file (image, video, or audio) to the platform’s storage solution.
- Enter your NFT’s metadata, including title, description, and attributes.
- Set your royalty percentage (e.g., 5-10%) to earn commissions on future resales.
- Review all details to ensure accuracy before proceeding.
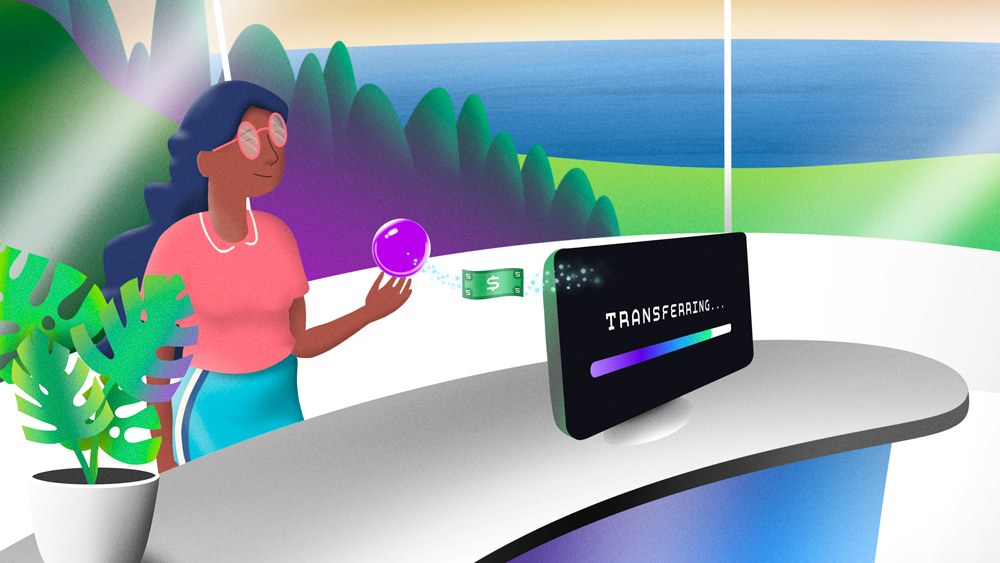
Step 5: Mint Your NFT on XRPL
Once your NFT details are set, you’re ready to mint:
- Click the “Mint” button on your platform.
- Confirm the transaction in your XRPL wallet (e.g., Xumm will prompt you to sign the transaction).
- Wait for the transaction to be processed—thanks to XRPL’s fast finality, this usually takes just a few seconds.
- Once confirmed, your NFT is officially minted and recorded on the XRP Ledger!
Congratulations! You now own a fully minted NFT on XRPL, secured by blockchain technology.
Step 6: Verify and Manage Your NFT
After minting, it’s important to verify that your NFT has been successfully created. Here’s how:
- Check your wallet balance to see the newly minted NFT in your XRPL wallet.
- Use an XRPL explorer (such as XRPSCAN) to verify the transaction and NFT metadata.
- Ensure your NFT is correctly displayed on the minting platform.
At this stage, your NFT is ready for use—whether that means holding it as a collectible, selling it on an NFT marketplace, or integrating it into a larger project.
Step 7: List Your NFT for Sale (Optional)
If you want to sell your NFT, you can list it on an XRPL NFT marketplace:
- Go to the marketplace where you minted your NFT.
- Click on “List NFT” and set your desired price in XRP.
- Choose whether to set a fixed price or auction format.
- Confirm the listing, and your NFT will be available for buyers!
With XRPL’s built-in decentralized exchange (DEX), transactions are seamless, and you can sell directly to buyers without intermediaries.
Final Thoughts on Minting NFTs on XRPL
By leveraging the XRP Ledger’s efficiency, low fees, and eco-friendly consensus mechanism, creators can mint and trade NFTs without the high costs and congestion associated with other blockchains. Whether you’re an independent artist or a brand looking to tokenize digital assets, XRPL provides a powerful, scalable, and sustainable solution for NFT creation.
Now that you’ve successfully minted your NFT, the next step is to manage and market it effectively. In the next section, we’ll explore how to store, transfer, and sell your NFT strategically to maximize its value in the growing XRPL ecosystem.
Managing and selling your NFT
Managing and Selling Your NFT
Now that you’ve successfully minted your NFT on the XRP Ledger, it’s time to explore how to manage and sell it effectively. Whether you’re looking to showcase your digital masterpiece, transfer it to another wallet, or list it for sale in an NFT marketplace, understanding the right strategies will help you maximize your NFT’s potential. Let’s walk through the essential steps to ensure your NFT remains secure, accessible, and market-ready.
Storing and Managing Your NFT
Once your NFT is minted, it resides on the XRP Ledger, but you’ll need a wallet that supports XRPL NFTs to interact with it. Here’s how to manage your NFT effectively:
- Viewing Your NFT: Most XRPL-compatible wallets, such as Xumm, allow you to see your NFT holdings. You can also use blockchain explorers like XRPSCAN to verify ownership and metadata.
- Transferring Your NFT: If you want to send your NFT to another wallet, simply initiate a transfer within your XRPL wallet. Ensure the recipient’s wallet supports XRPL NFTs to avoid complications.
- Security Best Practices: Since NFTs hold value, securing your wallet is crucial. Enable two-factor authentication (2FA) where possible, back up your seed phrase securely, and avoid sharing private keys.
Managing your NFT properly ensures that it remains accessible and protected, whether you plan to keep it as a collectible or sell it in the future.
Listing Your NFT for Sale
When you’re ready to sell your NFT, you’ll need to list it on an XRP Ledger-compatible marketplace. Here’s how:
- Choose the Right Marketplace: Several XRPL marketplaces support NFT listings, including:
- OnXRP – A leading XRPL marketplace with an intuitive interface.
- XRP Cafe – A user-friendly platform for NFT creators and collectors.
- Sologenic NFT Marketplace – A decentralized marketplace for trading XRPL-based NFTs.
- Connect Your Wallet: Navigate to the marketplace and connect your XRPL-compatible wallet, such as Xumm.
- List Your NFT: Select your NFT from your wallet and choose the listing options:
- Fixed Price: Set a specific price in XRP for direct purchases.
- Auction: Allow buyers to bid, setting a minimum reserve price.
- Confirm the Listing: Review the details, approve the transaction in your wallet, and finalize the listing.
Once listed, your NFT will be available for buyers on the marketplace, and you’ll receive XRP when a sale is completed.
Marketing Your NFT for Maximum Exposure
Minting and listing your NFT is just the beginning—effective marketing can drive more visibility and increase its value. Here are some strategies to promote your NFT:
- Leverage Social Media: Share your NFT on Twitter, Instagram, and Discord communities. Use relevant hashtags like
#XRPLNFTand#NFTCommunityto reach potential buyers. - Engage with NFT Communities: Join XRPL-focused NFT groups on platforms like Telegram and Reddit to network with collectors and investors.
- Collaborate with Influencers: Partner with NFT influencers or artists to showcase your work to a broader audience.
- Offer Exclusive Perks: Add value to your NFT by including unlockable content, such as high-resolution files, behind-the-scenes artwork, or real-world rewards.
By actively promoting your NFT, you increase its chances of selling at a favorable price while building a strong reputation in the XRPL NFT space.
Receiving Payments and Managing Royalties
When your NFT sells, the XRP payment is automatically transferred to your wallet. If you’ve set royalties during minting, you’ll also receive a percentage of secondary sales. Here’s what to keep in mind:
- Tracking Sales: Use blockchain explorers or marketplace dashboards to monitor transactions and royalties.
- Withdrawing Funds: Convert your earned XRP into fiat currency through exchanges like Binance or Kraken if needed.
- Reinvesting Profits: Consider reinvesting in other NFTs or XRPL-based assets to grow your portfolio.
Since XRPL’s transaction fees are minimal, you retain more of your earnings compared to Ethereum-based marketplaces, making it a profitable ecosystem for NFT creators.
Final Thoughts
Successfully managing and selling your NFT on the XRP Ledger involves more than just minting—it requires smart storage, strategic listing, and proactive marketing. By leveraging XRPL’s low fees, fast transactions, and built-in decentralized exchange, you can maximize your NFT’s potential while tapping into a growing ecosystem of collectors and investors.
Whether you’re an artist, entrepreneur, or investor, XRPL provides a solid foundation for NFT success. Now that you know how to mint, manage, and sell your NFT, the next step is to explore new opportunities in the evolving XRPL NFT space. Happy trading!