Welcome to the thrilling world of XRP, where digital currency meets revolutionary technology, and staying ahead in the game requires both savvy investing and secure storage. If you’ve been riding the XRP wave since 2018, like yours truly, or are just dipping your toes into these crypto waters, understanding how to securely store your XRP is paramount. After all, what good is a treasure chest if it’s not locked tight? Enter the realm of XRP hardware wallets—your digital Fort Knox in a USB form.
Now, let’s get one thing straight: storing XRP under your mattress is not an option, unless you enjoy sleepless nights filled with crypto-induced nightmares. A hardware wallet for XRP, like the Ledger XRP wallet or the Trezor XRP wallet, offers a physical crypto wallet solution that combines security with accessibility. But why all the fuss about these USB wallets? Well, in the volatile world of cryptocurrencies, they provide an essential layer of protection against hackers and digital miscreants. Are you ready to outsmart the cyber pirates?
XRP is not just a flashy digital coin; it’s a game-changer in the world of blockchain, finance, and trading. Its lightning-fast transaction speeds and low fees are revolutionizing cross-border payments and making traditional banking systems look like they’re stuck in the Stone Age. But here’s the catch: with great power comes great responsibility, and storing XRP securely is non-negotiable. This is where XRP hardware wallets come into play, ensuring your digital assets are guarded with the same diligence as the Crown Jewels.
For the uninitiated, a hardware wallet is a secure device that stores your private keys offline. Think of it as a safe deposit box, but instead of gold bars, it holds your precious XRP. The Ledger and Trezor wallets are the crème de la crème of this domain, offering unparalleled security features that make hackers weep. Ever heard of a hacker breaking into a USB drive? Neither have we. With these wallets, your XRP is not just stored—it’s fortified.
But wait, there’s more! A hardware wallet doesn’t just protect your XRP; it also provides peace of mind. Imagine being able to sleep at night knowing that your digital assets are as secure as Fort Knox. It’s like having a digital bodyguard that never sleeps. And the best part? Using these wallets is as easy as pie, even if you’re not a tech wizard. Simply plug in, follow the prompts, and voilà—your XRP is safe and sound.
Still skeptical? Consider this: in the Wild West of cryptocurrencies, where exchanges can be hacked and software wallets compromised, a physical crypto wallet is your best bet for secure XRP storage. It’s like having a trusted sidekick who always has your back. And let’s be honest, who doesn’t want a trusty sidekick?
So, whether you’re a seasoned XRP investor or a curious crypto enthusiast, understanding the ins and outs of XRP hardware wallets is crucial. From the Ledger XRP wallet to the Trezor XRP wallet, these devices are your ticket to secure and hassle-free crypto storage. Don’t leave your digital investments to chance—equip yourself with the tools to protect your assets and join the ranks of savvy investors who sleep soundly.
At XRPAuthority.com, we’re not just about providing information; we’re about empowering you with insights that matter. As the go-to source for all things XRP, we combine technical depth with a dash of humor to make your crypto journey as enlightening as it is enjoyable. So stick with us, and let’s navigate the exhilarating world of XRP together, one secure wallet at a time.
📌 Understanding XRP hardware wallet and Its Impact on XRP

Understanding XRP hardware wallets
Understanding XRP Hardware Wallets
For any serious crypto investor, security isn’t just an option—it’s a necessity. If you’re holding XRP, one of the most popular digital assets in the crypto space, you need a reliable way to keep it safe from hackers, phishing attempts, and exchange vulnerabilities. This is where XRP hardware wallets come into play. These physical devices offer an unparalleled level of security, ensuring that your digital fortune remains in your control, rather than at the mercy of an online exchange.
Unlike software wallets or exchange-based storage, a hardware wallet is a physical device—often resembling a USB drive—that securely stores your private keys offline. This makes it nearly impossible for hackers to access your funds, as the keys never leave the device. By keeping your XRP in a hardware wallet, you’re essentially placing your assets in a digital vault that only you can access.
Why XRP Holders Need a Hardware Wallet
Ripple’s XRP is a high-speed, low-cost digital asset designed for cross-border payments and institutional finance. Because of its growing adoption by banks and financial institutions, XRP has attracted both long-term investors and active traders. However, with increased popularity comes increased risk. Cybercriminals are constantly looking for ways to exploit digital wallets and exchanges, making self-custody a crucial consideration for any XRP holder.
Here’s why an XRP hardware wallet is a must-have:
- Offline Security: Unlike hot wallets that remain connected to the internet, hardware wallets store your private keys offline, making it virtually impossible for hackers to access your funds remotely.
- Protection Against Exchange Hacks: Crypto exchanges have been prime targets for cyberattacks, resulting in millions of dollars in stolen funds. Storing XRP on a hardware wallet removes this risk entirely.
- Full Control Over Your Assets: When you use a hardware wallet, you are the sole owner of your private keys. This means no third party—be it an exchange or a centralized entity—can freeze, restrict, or access your funds.
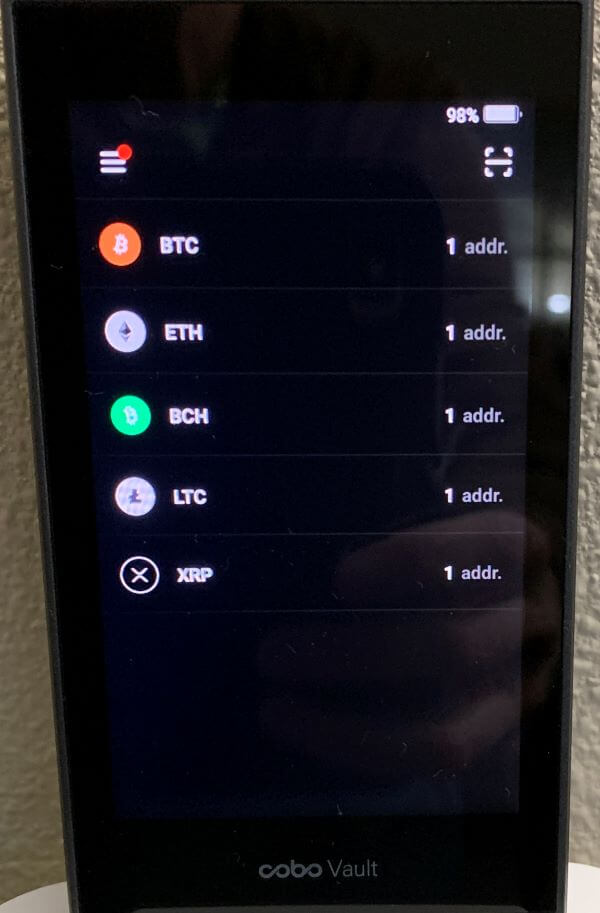
- Multi-Currency Support: Leading hardware wallets, such as Ledger XRP and Trezor XRP wallets, support multiple cryptocurrencies, allowing you to store various assets in one secure location.
- Ease of Use: Modern hardware wallets are designed with user-friendly interfaces, making them accessible even for those who are new to crypto security.
How XRP Hardware Wallets Work
At the core of an XRP hardware wallet is a secure chip that generates and stores your private key. When you initiate a transaction, the wallet signs it internally, ensuring that your private key never leaves the device. This eliminates the risk of key exposure, even if your computer or mobile device is compromised.
Here’s a step-by-step breakdown of how a hardware wallet functions:
- Key Generation: When setting up your wallet, it generates a unique private key that remains stored within the device.
- Transaction Signing: When sending XRP, the transaction details are transmitted to the hardware wallet. The device signs the transaction internally, ensuring the private key never interacts with the internet.
- Broadcasting the Transaction: Once signed, the transaction is sent back to your computer or mobile device and then broadcasted to the XRP network.
- Recovery Mechanism: In case of loss or damage, a recovery phrase (also called a seed phrase) allows you to restore access to your funds on a new device.
Popular XRP Hardware Wallets
Several hardware wallets support XRP, but some stand out due to their security features, user experience, and widespread adoption.
- Ledger Nano X: One of the most popular hardware wallets, the Ledger Nano X offers Bluetooth connectivity, a secure chip, and support for multiple assets, including XRP.
- Ledger Nano S Plus: A cost-effective alternative to the Nano X, the Nano S Plus provides robust security without the Bluetooth feature.
- Trezor Model T: Known for its touchscreen interface and open-source firmware, the Trezor Model T is a solid choice for XRP holders looking for a reliable hardware wallet.
By choosing a reputable hardware wallet like Ledger XRP or Trezor XRP, investors can ensure that their XRP holdings remain secure while maintaining full control over their assets. With the increasing adoption of XRP in cross-border payments and financial institutions, securing your holdings with a hardware wallet is a strategic move for any investor looking to protect their digital wealth.
Benefits of using a hardware wallet for XRP
Enhanced Security and Protection Against Cyber Threats
One of the most compelling reasons to store your XRP in a hardware wallet is the unparalleled security it offers. Unlike software wallets or exchange-based storage, hardware wallets keep your private keys completely offline, eliminating the risk of remote hacking attempts. Since your private keys never leave the device, even if your computer or smartphone is compromised, your XRP remains safe.
Cybercriminals are constantly developing sophisticated phishing schemes and malware to steal funds from unsuspecting crypto holders. With a hardware wallet, these threats are significantly mitigated because transactions must be manually verified and signed on the device itself. This extra layer of authentication ensures that even if a hacker gains access to your online accounts, they cannot move your XRP without physical access to your wallet.
Protection from Exchange Failures and Hacks
Crypto exchanges, no matter how reputable, remain vulnerable to hacks and security breaches. Over the years, numerous exchanges have suffered devastating attacks, resulting in millions of dollars in lost user funds. If you store your XRP on an exchange, you are essentially trusting a third party to safeguard your assets—an approach that contradicts the decentralized ethos of cryptocurrency.
By transferring your XRP to a hardware wallet, you eliminate the risk of exchange-related losses. You maintain full control over your holdings, ensuring that your assets are not at the mercy of an exchange’s security protocols or financial stability. Whether an exchange gets hacked, freezes withdrawals, or goes bankrupt, your XRP remains secure in your personal custody.
Full Ownership and Control of Your Assets
When you store your XRP on an exchange, you are not truly in control of your funds—the exchange is. They hold the private keys, and in many cases, they have the power to restrict access or even freeze accounts under certain circumstances. This lack of autonomy can be a major drawback, especially in times of market volatility or regulatory uncertainty.
With a hardware wallet, you are the sole owner of your private keys, giving you complete control over your XRP. No third party can access, restrict, or confiscate your funds. This is particularly important for investors who prioritize financial sovereignty and want to ensure that their assets remain accessible at all times.
Secure and Convenient Backup Options
Hardware wallets come with built-in recovery mechanisms to protect against loss or damage. When setting up your device, you will be provided with a recovery phrase (also known as a seed phrase), which serves as a backup of your private keys. If your hardware wallet is ever lost, stolen, or damaged, you can use this recovery phrase to restore access to your XRP on a new device.
It’s crucial to store your recovery phrase in a secure location, preferably offline and away from prying eyes. Many investors opt for metal backup solutions that protect the recovery phrase from fire, water, and physical damage. By keeping your backup phrase safe, you ensure that your XRP remains accessible even in worst-case scenarios.
Multi-Currency Support and Investment Diversification
Leading hardware wallets such as Ledger XRP and Trezor XRP wallets support a wide range of cryptocurrencies, allowing you to manage multiple assets in one secure device. This is particularly beneficial for investors who diversify their holdings across different digital assets.
Instead of juggling multiple wallets for different cryptocurrencies, you can store Bitcoin, Ethereum, XRP, and other assets in a single hardware wallet. This level of convenience makes portfolio management easier while ensuring that all your investments remain protected under the same high-security standards.
Seamless Integration with Cryptocurrency Applications
Modern hardware wallets offer seamless integration with various cryptocurrency applications, enabling users to manage their XRP with ease. Whether you prefer using Ledger Live, Trezor Suite, or third-party wallets, most hardware wallets provide a user-friendly interface that simplifies transactions.
For example, the Ledger XRP wallet allows users to send, receive, and stake XRP directly through the Ledger Live app. This integration not only enhances security but also streamlines asset management, making it easier for investors to track their portfolio in real time.
Long-Term Security for Institutional and Retail Investors
With XRP gaining traction in institutional finance and cross-border payments, long-term investors need a secure way to store their holdings. Whether you’re holding XRP as a strategic investment or using it for international transactions, a hardware wallet ensures that your funds remain protected for years to come.
Unlike software wallets that may become vulnerable over time due to outdated security protocols, hardware wallets receive regular firmware updates to address potential threats. This proactive approach to security makes them a reliable choice for both institutional and retail investors looking to safeguard their XRP holdings.
By choosing a reputable hardware wallet such as the Ledger Nano X or Trezor Model T, XRP investors can enjoy peace of mind knowing that their assets are stored in a secure, offline environment. As the cryptocurrency landscape continues to evolve, prioritizing security with a hardware wallet is a smart move for anyone serious about protecting their digital wealth.
How to set up an XRP hardware wallet
Step-by-Step Guide to Setting Up an XRP Hardware Wallet
Setting up an XRP hardware wallet might seem intimidating at first, but it’s actually a straightforward process that ensures your digital assets remain secure. Whether you’ve chosen a Ledger XRP or a Trezor XRP wallet, proper setup is crucial to protecting your funds from cyber threats. Below is a step-by-step guide to getting your hardware wallet up and running.
1. Unbox and Inspect Your Hardware Wallet
Before you begin, carefully unbox your hardware wallet and check for any signs of tampering. Reputable manufacturers like Ledger and Trezor seal their products securely, and any broken seals or suspicious packaging could indicate a compromised device.
Inside the box, you should find:
- The hardware wallet device
- A USB cable for connecting to your computer or mobile device
- A recovery seed card (used for backup purposes)
- A user manual or setup guide
Once you’ve confirmed that everything is intact, you’re ready to proceed with the setup.
2. Connect Your Hardware Wallet to a Computer or Mobile Device
Most modern hardware wallets, such as the Ledger Nano X, offer Bluetooth connectivity, allowing you to set up the device wirelessly. However, if you’re using a Ledger Nano S Plus or Trezor Model T, you’ll need to connect it via USB.
Follow these steps:
- Plug the hardware wallet into your computer using the provided USB cable.
- If using a Ledger device, download and install the Ledger Live application from the official Ledger website.
- If using a Trezor device, visit Trezor’s official setup page and follow the on-screen instructions.
- Ensure that you’re downloading software only from the manufacturer’s official website to avoid phishing scams.
3. Initialize and Secure Your Wallet
Once your device is connected, you’ll need to initialize it by following the on-screen instructions. This process includes:
- Creating a new wallet: If this is your first time using the device, select the option to create a new wallet.
- Setting a PIN code: Choose a strong PIN code to prevent unauthorized access. Avoid using simple combinations like “1234” or “0000.”
- Generating and writing down your recovery seed: Your hardware wallet will generate a unique 12- or 24-word recovery phrase. Write this down on the provided recovery card and store it in a safe place.
Important: Never share your recovery phrase with anyone. This phrase is the only way to restore access to your funds if your hardware wallet is lost or damaged.
4. Install the XRP App on Your Hardware Wallet
To store and manage XRP, you need to install the appropriate application on your hardware wallet.
If you’re using a Ledger XRP wallet:
- Open the Ledger Live app and navigate to the “Manager” tab.
- Search for “XRP” and install the app onto your Ledger device.
- Follow the on-screen instructions to complete the installation.
If you’re using a Trezor XRP wallet:
- Ensure your device is set up and connected to Trezor Suite.
- Check for firmware updates and install them if necessary.
- Confirm that XRP is supported on your device, then proceed with account creation.
5. Transfer XRP to Your Hardware Wallet
Now that your wallet is set up, it’s time to transfer your XRP from an exchange or another wallet to your hardware wallet.
- Open the Ledger Live or Trezor Suite application and navigate to the XRP account.
- Click “Receive” and copy the generated XRP wallet address.
- Go to your exchange or software wallet, paste the copied address, and initiate the transfer.
- Verify the transaction details carefully before confirming.
- Wait for the transaction to be processed and confirmed on the XRP Ledger.
Once the transfer is complete, your XRP will be securely stored in your hardware wallet.
6. Verify and Manage Your XRP Holdings
After transferring your XRP, always verify that the transaction was successful. You can do this by checking your wallet balance in Ledger Live, Trezor Suite, or any blockchain explorer that supports XRP.
To manage your XRP, you can:
- Send XRP to other wallets or exchanges directly from your hardware wallet.
- Monitor transaction history and balance through your wallet’s interface.
- Use additional security features such as passphrase protection for enhanced safety.
7. Store Your Hardware Wallet and Recovery Phrase Safely
Now that your XRP is secured, it’s essential to store both your hardware wallet and recovery phrase in a safe location.
- Keep your hardware wallet in a secure place, such as a safe or locked drawer.
- Store your recovery phrase offline—never take a photo or save it digitally.
- Consider using a fireproof and waterproof metal backup solution for added protection.
- Do not share your PIN or recovery phrase with anyone, as this could lead to unauthorized access.
Final Thoughts on Setting Up an XRP Hardware Wallet
By following these steps, you’ve ensured that your XRP holdings are protected against online threats, exchange failures, and unauthorized access. A hardware wallet like Ledger XRP or Trezor XRP is one of the most reliable ways to store your digital assets securely while maintaining full control over them.
As XRP continues to play a crucial role in cross-border payments and institutional finance, securing your holdings with a robust hardware wallet is a smart move for any investor. With proper setup and diligent security practices, you can safeguard your XRP for the long term and enjoy peace of mind knowing your investment is safe.
Best XRP hardware wallets to consider
Best XRP Hardware Wallets to Consider
Choosing the right XRP hardware wallet is crucial for securing your digital assets while maintaining ease of use and accessibility. With multiple options available, it’s essential to consider factors like security, functionality, and compatibility before making a decision. Below, we explore the best XRP hardware wallets on the market, breaking down their features, strengths, and potential drawbacks.
1. Ledger Nano X – The Industry Leader
The Ledger Nano X is widely regarded as one of the most secure and feature-rich hardware wallets available. Designed with advanced security measures, this device is perfect for XRP holders looking for a reliable, future-proof storage solution.
- Security: The Nano X features a secure element (SE) chip, the same level of security used in passports and credit cards, ensuring your private keys remain protected at all times.
- Bluetooth Connectivity: Unlike its predecessor, the Nano X supports Bluetooth, allowing users to manage their XRP holdings on the go via the Ledger Live mobile app.
- Multi-Currency Support: In addition to XRP, the Nano X supports over 5,500 cryptocurrencies, making it ideal for investors with diverse portfolios.
- Battery Life: The built-in battery allows for wireless transactions and extended usability without needing to be plugged in constantly.
- Downside: Slightly more expensive than other models, but the additional features justify the price.
The Ledger Nano X is an excellent choice for both beginners and seasoned investors who prioritize security and convenience. Its seamless integration with Ledger Live provides a smooth user experience for managing XRP and other assets with ease.
2. Ledger Nano S Plus – Affordable and Reliable
If you’re looking for a budget-friendly alternative with robust security, the Ledger Nano S Plus is a fantastic option. While it lacks Bluetooth connectivity, it retains all the essential features necessary for secure XRP storage.
- Secure Element Chip: Just like the Nano X, the Nano S Plus ensures private keys stay offline, reducing the risk of hacks.
- USB-C Connection: The upgraded USB-C port makes it easier to connect to modern devices.
- Multi-Currency Support: Capable of storing up to 100 apps simultaneously, supporting XRP and thousands of other cryptocurrencies.
- Affordable Price: One of the most cost-effective hardware wallets without compromising on security.
- Downside: No Bluetooth support, meaning it must be connected via USB to manage assets.
The Ledger Nano S Plus is perfect for investors who want a secure, no-frills hardware wallet at an affordable price. Its compact design and strong security make it a solid choice for long-term XRP storage.
3. Trezor Model T – Touchscreen Convenience
The Trezor Model T is another top-tier hardware wallet that supports XRP. Known for its open-source firmware and touchscreen interface, the Model T offers a user-friendly approach to crypto security.
- Touchscreen Interface: Unlike Ledger devices, the Model T features a touchscreen for easier navigation and transaction verification.
- Open-Source Firmware: Trezor’s firmware is open-source, meaning the security community can continuously audit and improve it.
- Multi-Currency Support: Supports XRP along with Bitcoin, Ethereum, and hundreds of other digital assets.
- Shamir Backup: An advanced recovery feature that allows users to split their recovery phrase into multiple shares for added security.
- Downside: More expensive than Ledger devices, and lacks a secure element chip, which some users prefer.
The Trezor Model T is ideal for those who value open-source security and a touchscreen interface for easier interactions. While it lacks a secure element chip, its robust security features and reputation make it a strong contender for XRP storage.
4. SecuX V20 – A Premium Alternative
The SecuX V20 is a premium hardware wallet that combines security and design. With a sleek look and a large touchscreen, it’s an excellent option for users who want a high-end experience.
- Military-Grade Security: The device features a secure element chip for enhanced protection.
- Large Touchscreen: A 2.8-inch touchscreen makes navigating and verifying transactions easier.
- Bluetooth and USB Support: Offers flexibility in connectivity options.
- Multi-Currency Support: Compatible with XRP and numerous other cryptocurrencies.
- Downside: Higher price point, making it less appealing for budget-conscious investors.
The SecuX V20 is a great choice for users who want a premium hardware wallet with a modern interface. Its combination of security and usability makes it a compelling option for XRP investors.
5. KeepKey – A Simple and Elegant Option
For those who prefer simplicity, the KeepKey hardware wallet offers a straightforward approach to securing XRP.
- Simple Interface: Large OLED display makes transaction verification easy.
- Affordable Pricing: One of the most budget-friendly hardware wallets available.
- Multi-Currency Support: Supports XRP along with other major cryptocurrencies.
- Downside: Lacks advanced security features like a secure element chip.
The KeepKey wallet is a good option for beginners who want a simple yet effective way to store XRP securely.
Final Thoughts on Choosing the Best XRP Hardware Wallet
When selecting an XRP hardware wallet, it’s important to consider your specific needs, budget, and security preferences. Here’s a quick recap of the best options:
- Ledger Nano X: Best overall, with Bluetooth support and top-tier security.
- Ledger Nano S Plus: Best budget-friendly option with strong security.
- Trezor Model T: Best for users who prefer a touchscreen interface and open-source security.
- SecuX V20: Best premium option with a large touchscreen.
- KeepKey: Best for simplicity and affordability.
Regardless of which hardware wallet you choose, securing your XRP in an offline device is one of the smartest moves you can make as an investor. With institutional adoption of XRP growing and its role in cross-border payments expanding, ensuring your holdings are safe from cyber threats is more important than ever. Invest in a reliable hardware wallet today and take full control of your digital assets.